|
HOW TO...
Take Clearer Pictures |
 |
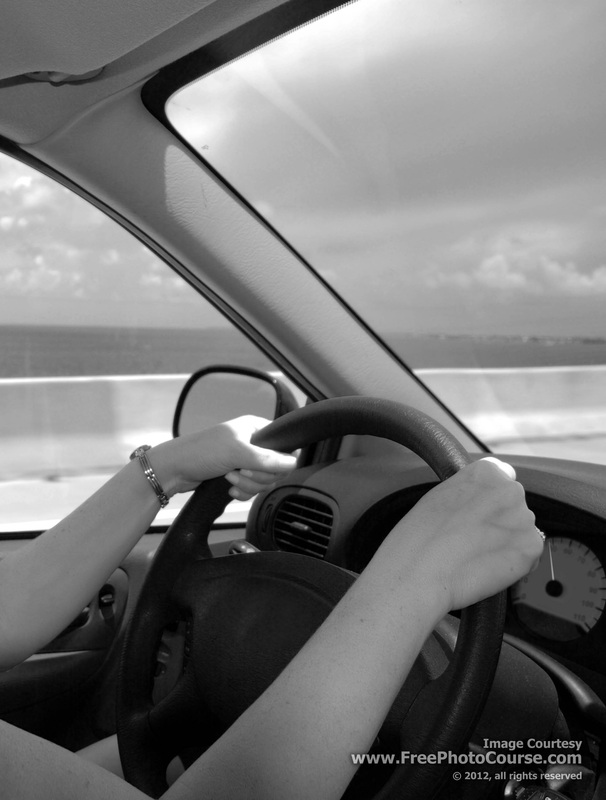 When you're in a moving car, why is it that objects inside the car seem to be still even though the vehicle is moving? It has to do with relative speed and its effect on photo clarity. |
Article by Nathan Anderson
Staff Writer/Photographer © 2012, FreePhotoCourse.com; all rights reserved Take a quick look at the photo on the left. It's a scene with which most people are all too familiar; that is, seeing life go by from the inside a car. So, what does this have to do with photography? It's about how motion or 'speed' is a relative thing - particularly when taking pictures. A visitor to our site recently posted a question in our Aperture Forum. He asked why his new camera was producing inconsistent results, in terms of picture clarity. He said, "Some (pictures) are blurry, but others are sharp as a tack." He mentioned that using a shutter speed of 1/125 of a second, his photos of still subjects had inconsistent clarity. Our visitor couldn't imagine that motion blur would occur at that relatively fast shutter speed - particularly since the subject matter was still life. A helpful photographer posted a response suggesting that the problem was more likely due to camera shake, than it was due to camera failure. Our staff added to the response with an exaplanation of something called "relative speed" and its effect on the clearness of pictures. |
So, what's this relative speed thing all about? First things first. An object is considered to be in motion when it continuously changes its position relative to a reference point. In photography, the reference point is your camera. Second, the notion of speed is defined by the distance that an object travels in a certain period of time. When you bring the "relative" aspect into the concept of speed, it's about how fast or slow the motion appears to be moving from the vantage of a particular reference point.
The picture above of the woman driving the car reminds us that, depsite the fact that the woman is moving at 60 miles per hour (mph), when she looks at the spedometer, the keys in the ingition, or at her cup of coffee sitting in the drink holder, these items appear to be motionless. The truth is that they are all traveling at the same 60 mph speed. However, the relative speed from her vantage point (the point of reference) is zero, because they are all moving at the same constant and in the same exact direction, rendering the appearance of a total lack of motion and speed.
"When something is in motion, it's relative speed is faster when it is closer
and slower when it is farther away."
Here's another example that may help you understand this concept of relative speed. Ever watch a commercial jet crossing the sky above your backyard? From your reference point, when that jet is at cruising altitude, it takes a minute or two to cross the entire sky (your field of vision). The jet's actual speed is around 570 mph. However, while flying overhead at about 35,000 feet, it appears to be traveling at a relative speed of only 1 or 2 mph. If you take a picture of the same jet using a 50mm lens (1x power - no magnification) and a fairly slow shutter speed of 1/60 of a second, it will render a totally clear picture.
But if you use a powerful telephoto lens of 1000mm (20x power), the jet will move across your frame or field of vision very quickly. The same 1/60 shutter speed would now result in significant motion blur. Relative to your camera, the jet is now moving faster, so its relative speed is faster.
Bottom line here? When something is in motion, it's relative speed is faster when it is closer and slower when it is farther away. Putting this into play? When you get closer (or zoom in) to a moving subject, you need faster shutter speeds to avoid motion blur.
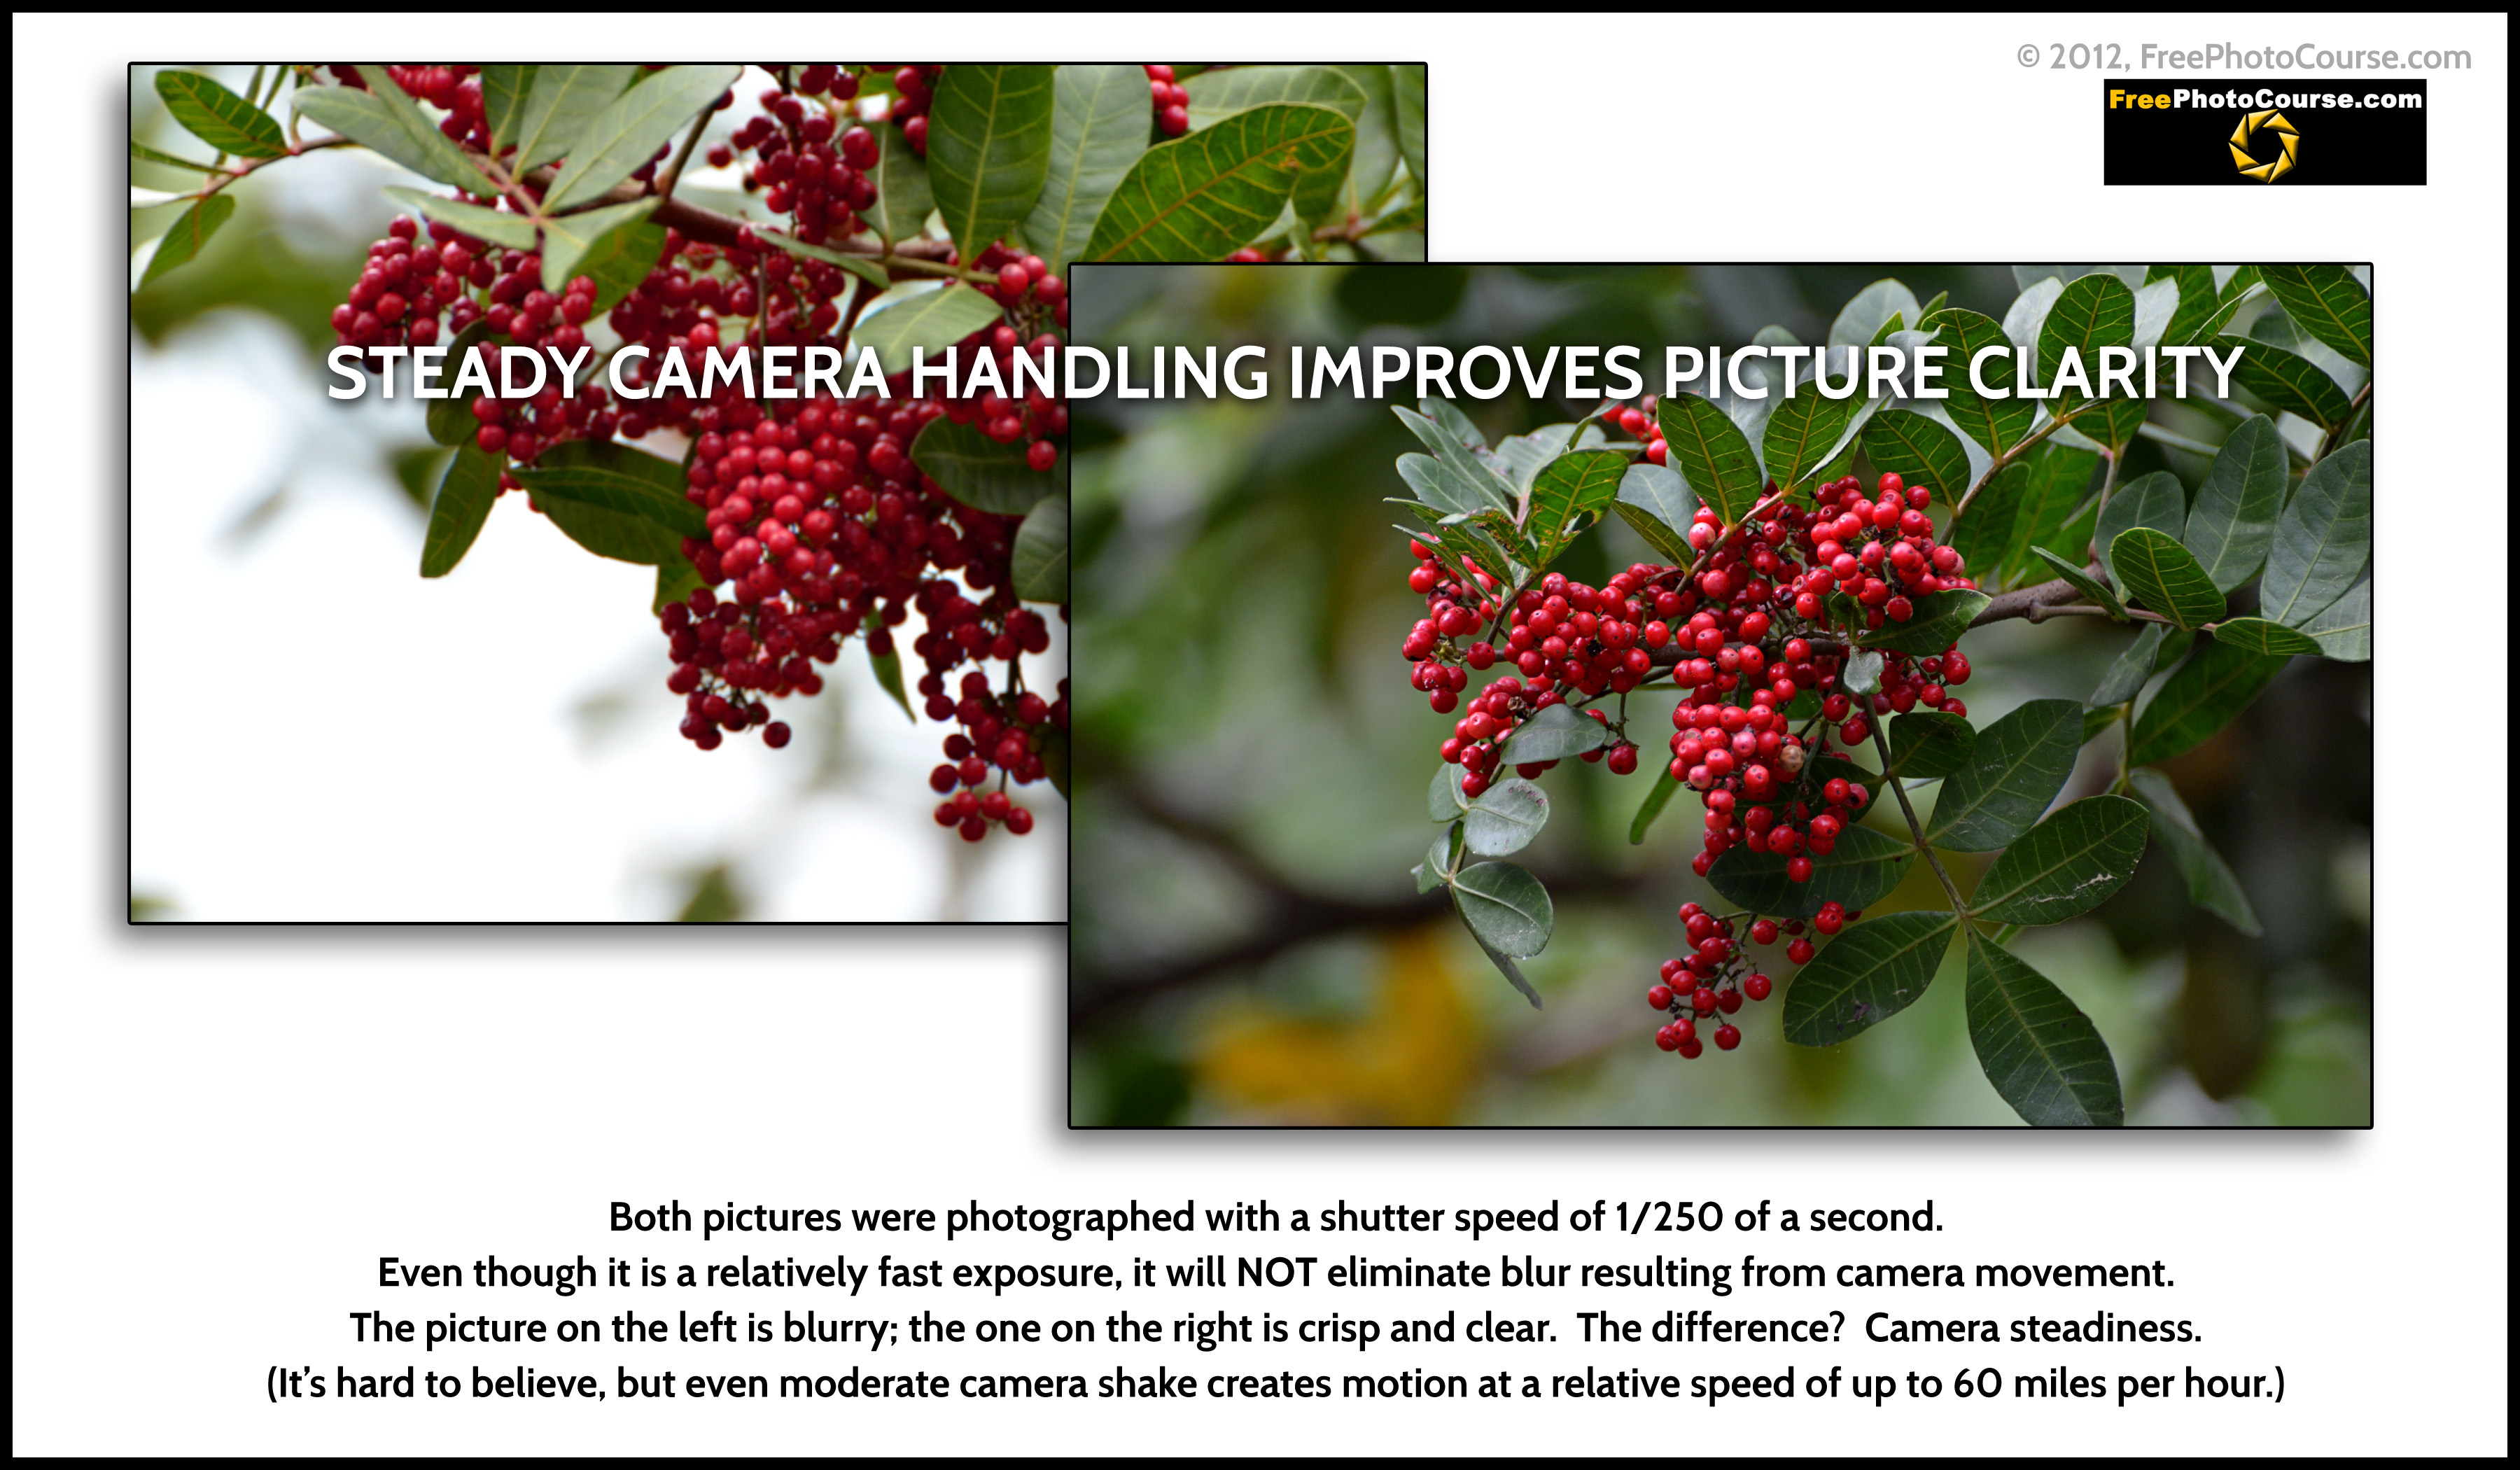
What does this have to do with camera shake? So, how fast does your camera move when you shake it a little bit? When you stab at your shutter button rather than gently pushing it, you actually send your camera in a downward motion that, from the reference point of the image sensor, is moving in excess of 60 mph! Look at the illustration below:
|
5 Tips for Taking Amazingly Crisp and Clear Pictures Clearer Pictures Tip #1 HOLD THE CAMERA FIRMLY: How to hold the camera...are you kidding? Sounds silly, but the truth is that most people don't hold their DSLR camera the way it was designed to be held. If you have a small point-and-shoot camera, you'll have to do your best to keep it steady, but the size and shape of a DSLR camera dictates a bit of a different strategy. With your right hand, position your forefinger above the shutter button and WRAP YOUR REMAINING FINGERS FIRMLY AROUND THE FRONT OF THE CAMERA. Use your right hand to take the picture; use your left hand and arm to support the weight of the camera. Clearer Pictures Tip #2 ELBOWS IN: If you have a DSLR, try to get into the habit of using your optical viewfinder rather than your "live view" LCD screen when taking pictures. Although the LCD screen on the back of your camera can be very useful in certain situations, such as during fast moving sports events, its use encourages improper camera handling technique. If you don't have a DSLR or must use the back screen, try to bring the camera as close as possible to your face. Alternatively, the first priority is to use the optical viewfinder and, while doing so, consciously bring your elbows into the sides of your torso. This will help you to steady your forearms, becoming something of a human tripod! Clearer Pictures Tip #3 LEAN AGAINST SOMETHING: If you're near a wall, flat surface, pole, railing, etc., take advantage of the sturdiness it has to offer. Most professional photographers know that the body can tire rather quickly when working a full standing photo session. They learn to lean against flat surfaces as much as possible, both to lessen fatigue and to reduce their own motion and subsequent blur. Clearer Pictures Tip #4 PLANT YOUR FEET APART AND FIRMLY ON THE GROUND: Correct photo taking posture is not merely involved with the torso, but with the entire body. Your torso will be far more steady if you stand with feet apart at shoulder width and flat against the ground. If you want to do photography for a living or are taking-on long photo sessions, wear shoes that are appropriate for the occasion, but are also comfortable and that provide support. Clearer Pictures Tip #5 PRESS, RATHER THAN, JAB AT THE SHUTTER: You may not even be aware of the significant downward motion that jabbing at a shutter button can cause. The shutter actually requires very little pressure and certainly not enough to move the entire camera. Study how you press the shutter and you may learn that your instinctive technique is far less gentle than is required. |
|
All of the above tips are related to photo sessions during which
tripod use is not possible.
If you are able to use a tripod, this is the BEST way to eliminate camera movement!
HOW-TO PHOTOGRAPHY ARTICLES INDEX
LINKS:
HOME PHOTO TIPS INDEX DIGITAL PHOTOGRAPHY COURSE "HOW TO" INDEX PHOTO FORUM
SITE SEARCH CONTRIBUTOR'S GALLERY CAMERA & GEAR STORE FREE PICTURES & WALLPAPERS
PHOTOGRAPHER PROFILES "GREAT CITIES EXPOSED" Photo Exhibit Series
© FreePhotoCourse.com. All rights reserved. Reproduction, storage, copying, publishing, manipulation, digitizing or selling of any of the text or photos on this website is strictly prohibited. Under no circumstances shall any part of the content on this website be plagiarized or referenced as the work of an author or photographer. Re-selling of any of the content on this site is strictly prohibited. The lessons on this website were provided free of charge for individual home users; if you paid for any of this you have been cheated. Please report any misuse, sale or plagiarism of this material here OR E-MAIL US AT: CONTACT@FREEPHOTOCOURSE.COM
Browse, learn, purchase and explore with confidence.
Certified virus-free, malware-free, spyware-free, scam-free and spam-free
Associate-Sponsor Disclosure Content Download & Terms of Use Privacy Policy Contact Us Contributor's Gallery Terms of Use Forum Terms of Use
Certified virus-free, malware-free, spyware-free, scam-free and spam-free
Associate-Sponsor Disclosure Content Download & Terms of Use Privacy Policy Contact Us Contributor's Gallery Terms of Use Forum Terms of Use