|
HOW TO...
Create a Dramatic Dark Sky Effect in Photography |
 |
You asked and we answered! We've received many emails asking us to explain how photographers get dramatic landscape photos that 'pop' with deep, dark blue skies and white puffy clouds. In this article, Emma David shares some more easy-to-use, yet extremely effective secrets used by professional photographers around the world. She reveals simple techniques and a basic camera accessory that are sure to turn your outdoor daytime pictures into award-winning works of photographic art!
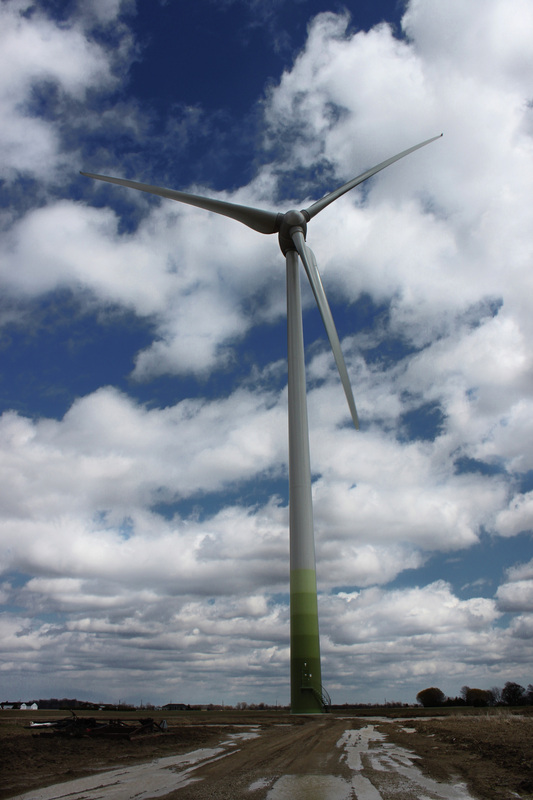 © 2011, Katie Donaldson Canon EOS Rebel T1i, 18mm Focal Length; f/11, 1/320, ISO 100 |
How to Make Pictures with Deep, Dark Skies and White Puffy Clouds
By Emma David Staff Writer/Photographer © 2011, FreePhotoCourse.com; all rights reserved If you’re ‘into’ photography, you’ve likely tried to create dramatic landscape photographs. You know the kind…those heart-stopping images you’ve seen in glossy nature or photography magazines. What you really want is the deepest blue sky yielding to brilliant white puffy clouds. And if you’re like most amateur photographers, you’ve probably come-up short on your attempts. If you know your way around photo editing programs such as Photoshop, you’ve also likely tried to take a bland photo that seems to be lacking in the “deep sky and crisp white cloud department”, and turn it into something with more punch. However, again like most people, you’ve probably found that doing this only makes the picture too contrasty with an unrealistic appearance. This article will help you get those breathtaking deep skies and puffy cotton ball clouds without “faking” it by artificially increasing contrast or using HDR in post-processing. Fortunately, it's easier than you may realize; there are some basic camera techniques anyone can use and a simple, yet, essential accessory that will make all the difference in the world to get you capturing gorgeous, professional-looking landscape pictures. |
|
First things first, though. Whether your subject matter is a wide-open sweeping pasture, mountainous terrain, architecture, an ocean/lake vista, a mirror-like reflection in water or the imposing wind turbine in Katie Donaldson's striking image above, you have to determine just how much prominence you want to give the sky. Once you know the secrets revealed below, it’s actually quite easy to get those dark skies and white clouds to look as dramatic in a photograph as they do in real life. Having said this, you'll have to decide to what degree do you want the sky to be prominent. (Boost the depth of the sky too much and it can take center stage, which may eclipse what you had intended to be the main subject or focal point.)
|
|
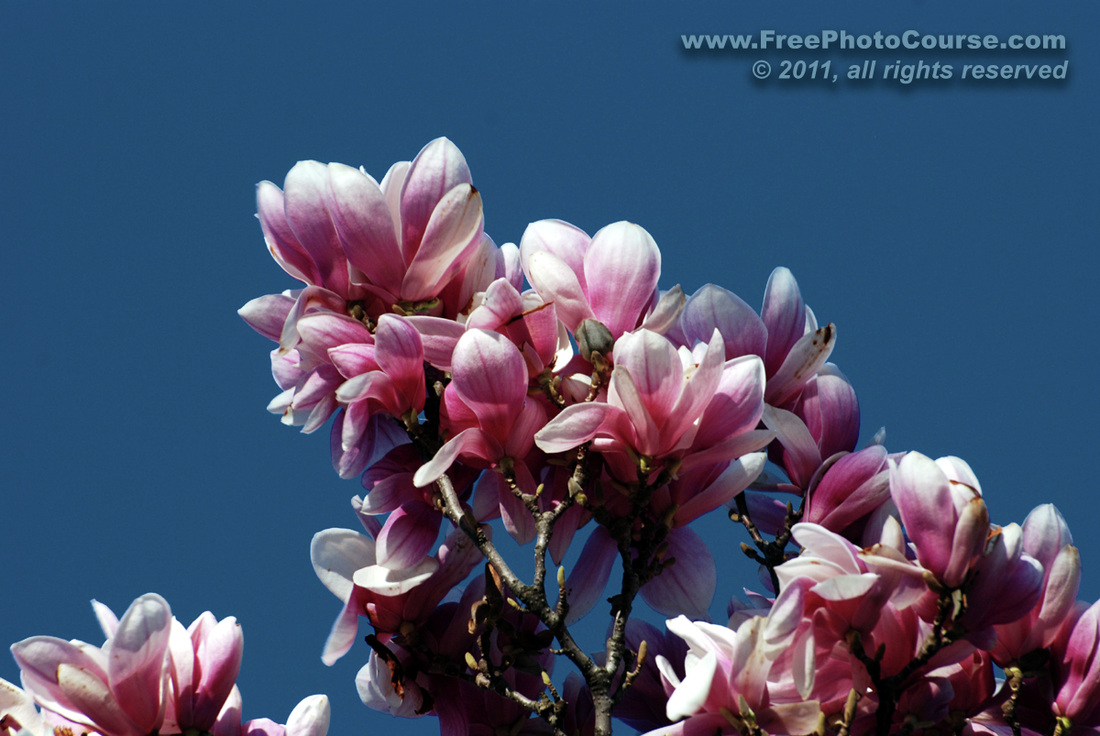
4 Secrets to Create a Dark Blue Sky Effect in
COLOR Photography 1. Turn your Lens Away From the Sun Have you ever noticed that on a clear day, the sky appears deep blue in some areas and pale blue in others? It has everything to do with the position of the sun and your angle in relation to it. The same phenomenon applies when you’re looking through the lens. Look or point your lens toward the sun and the sky gets brighter and its color washes-out. Change your direction so that you are shooting away from the sun and you’ll notice that the sky’s color and shade become richer. 2. Photograph at a 90-120 Degree Angle to the Sun Where is the darkest part of the sky? Here’s a ‘handy’ guide: With your back to the sun, point your thumb toward the sun and extend your index finger. Your index finger points toward the darkest part of the sky. Try it out and you'll see that it's usually right-on! 3. Avoid Mid-Day Photography (if Possible) The sun’s rays are at their steepest path around mid-day. This steep angle, in combination with the filtering of certain wavelengths and atmospheric conditions, contributes to a generally lighter and less saturated sky. If you must do a photo session around mid-day, look toward the horizon; you’ll notice that the sky seems darkest at the horizon opposite the sun’s geographical position, which in the Northern hemisphere would be the northern horizon. If you live south of the equator, the opposite applies – the southern horizon would be darkest at noon. 3. Bracket Your Exposure for Less Light If you use automatic metering, after shooting your image(s), step-down your exposure a bit by adjusting the EV (Exposure Value) button to the negative. Take another picture at -.5, another at -1 and another at -1.5. If you are a more advanced photographer and use manual metering, take your first photograph by levelling-out your meter as you usually would. Then bracket by shooting three or four successive pictures at increasingly smaller apertures (higher f/stop numbers). This usually deeps the color tone of your sky. The only drawback to this particular technique is that it can also make the other content in your photo too dark and can increase the contrast of shadows. (You could try taking a number of bracketed, but otherwise identical, pictures using a tripod and then use Photoshop to selectively erase parts of the darker layer/image that are too dark.) |

4. Use a Polarizing Filter
What is it? Unlike virtual, computer-based Photoshop ‘filters’, a polarizing filter is an indispensable piece of physical camera gear that most serious photographers swear by for many aspects of outdoor photography. A polarizer screws into the filter threads at the front of your camera lens. Manufacturers make polarizing filters in different diameters to fit virtually every DSLR lens on the market. Most of today's polarizing filters are circular which best accommodates the auto-focus feature that is common to most modern lenses.
What Does it Do? Much like a pair of polarized sunglasses, a photographic polarizing filter effectively cuts glare and haze on reflective surfaces such as water, glass and metal. Even more impressively, it can deepen the color of a blue sky, making it appear more attractive and realistic in a photograph. The polarizing filter can also make an outdoor scene 'pop' with the kind of crispness and natural contrast that makes things look so lush and rich on a sunny day.
How Does it Work? The polarizing filter actually has two parts or 'rings'. The first ring attaches to your lens as you screw it into the lens' threads. The second ring contains the greyish polarized glass and it can be rotated freely. As you turn this outer polarizing glass, a portion of the light wavelength is filtered out. Perpendicularly incident light waves tend to reduce clarity and color which increases haziness. The polarizing lens effectively absorbs these offending light waves, rendering your outdoor scenes crisper with colors that are deeper and truer.
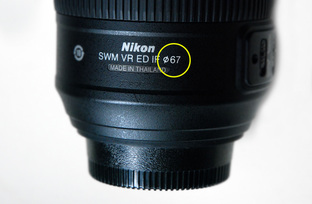
How Do I Know the Filter Size for my Lens?
Look for the lens diameter indicator which is usually printed somewhere on the lens itself. The following symbol: " ø " stands for diameter and you will see it preceding the filter size. On most Canon and Pentax lenses, it is found on the front of the lens; on Nikons it is usually printed on the underside of the lens as shown below. Whatever you do, don't confuse the lens diameter with the focal length. (ie. a 18-135mm zoom lens refers to the focal length and not the diameter. The diameter looks like: "ø 67mm".) |
|
|
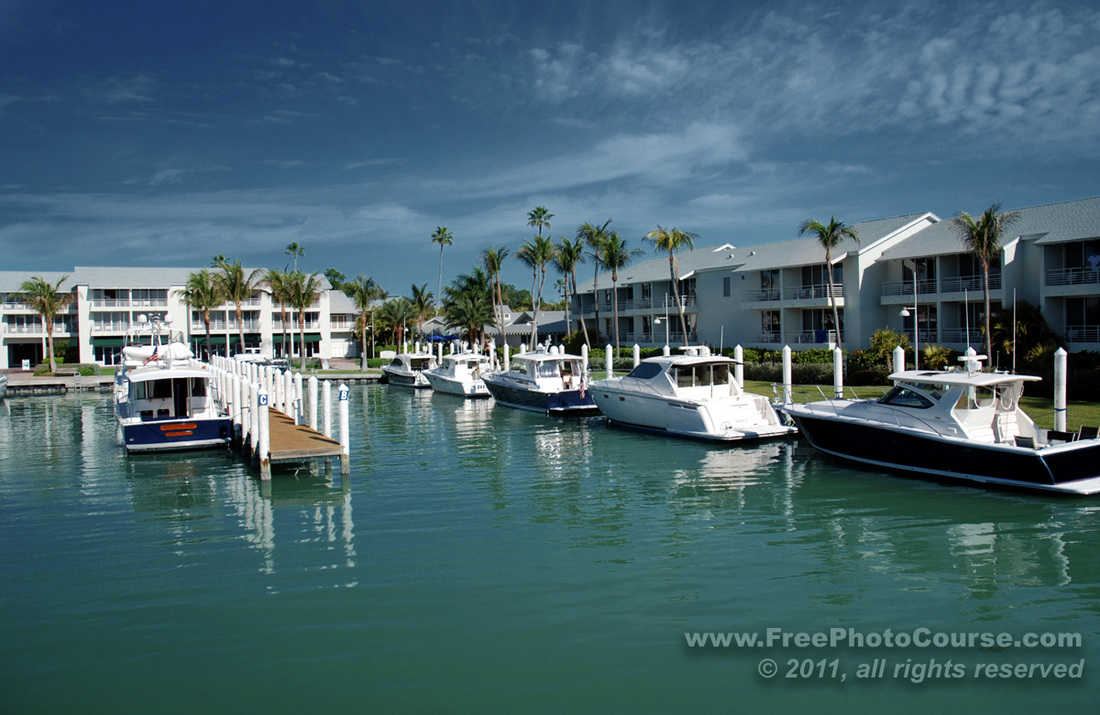
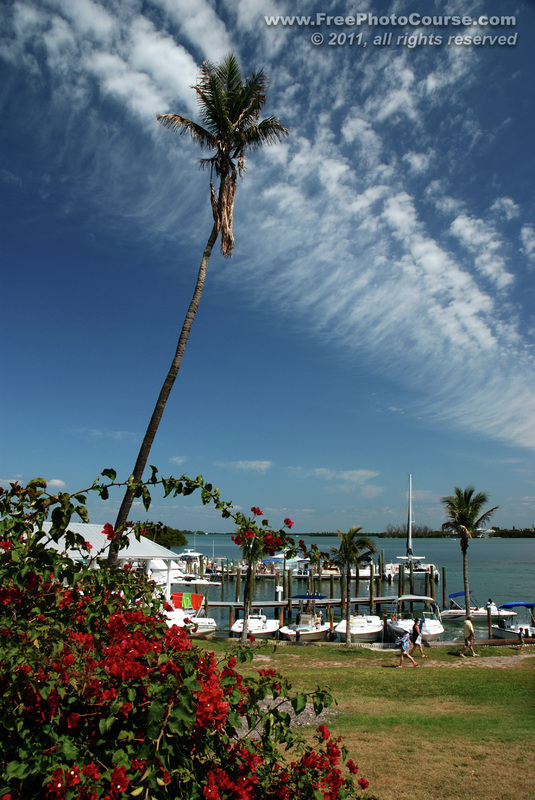
The Images Below Show the Difference that a Polarizing Filter Makes: No Polarization With Polarization
|

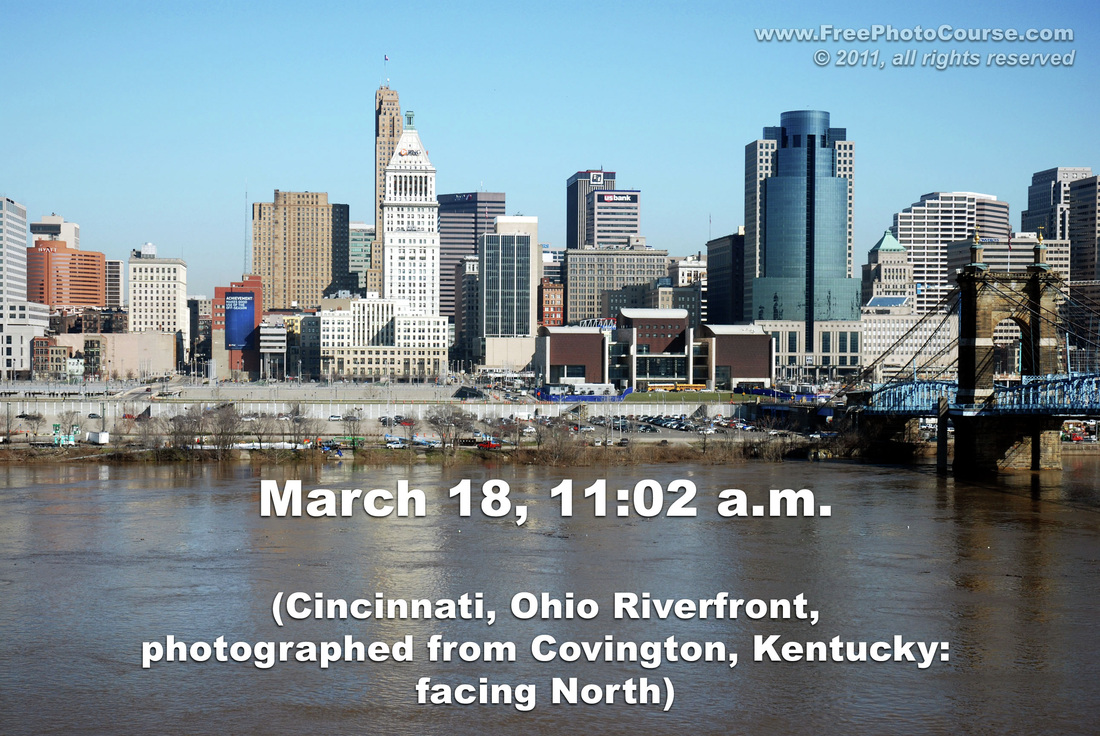
The next set of pictures below illustrates how TIME OF DAY
can effect depth of sky tone and shade:
 |
 |
Two pictures of the Cincinnati, Ohio riverfront, photographed from the bank of the Ohio River on the Covington, Kentucky side of the state border. Although the two pictures are generally similar in content, they effectively demonstrate how the time of day can impact the depth of the sky's tone and shade. In the first image to the left, the camera is facing north; the sun's overhead position tends to wash-out the blue sky. Later in the day, the sun is beginning to descend into the west-southwest sky; the camera lens is pointed toward the North and the result is a far deeper sky.
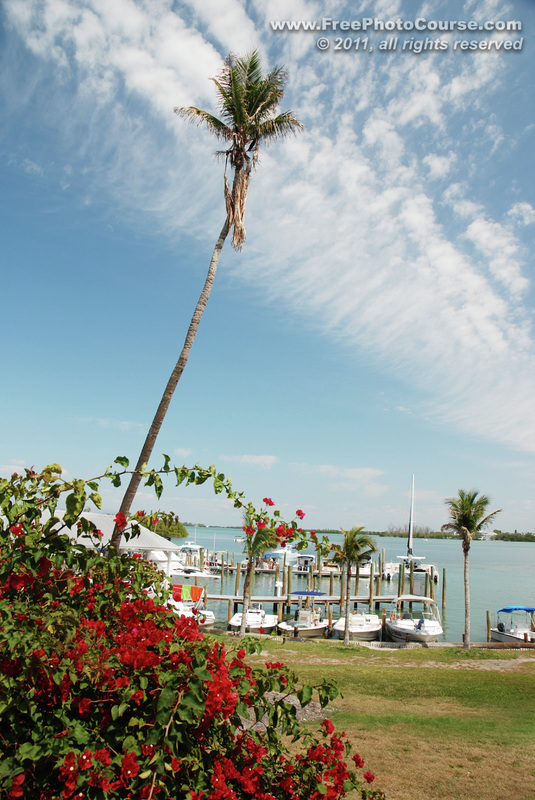
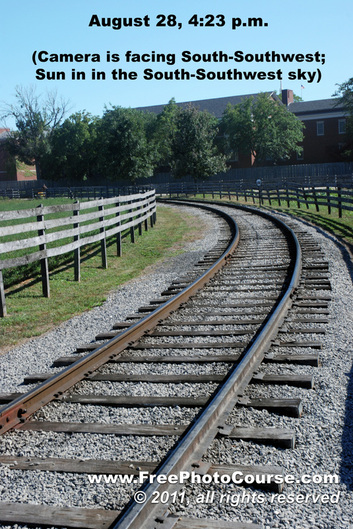
The next set of pictures below illustrates how DIRECTION OF LENS
can effect depth of sky tone and shade:
 |
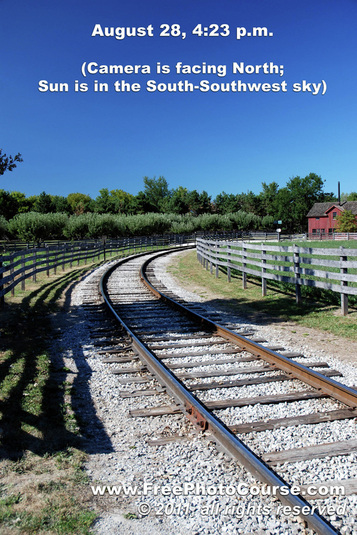 |
Professional photographers know and use these secrets, and now you can too!
In no time, you'll be creating deep blue sky effects just like the
pictures on the right side above!
If you want to know how to get a dark or black sky effect in monochrome photography,
check back soon for our next "How To" update.
check back soon for our next "How To" update.
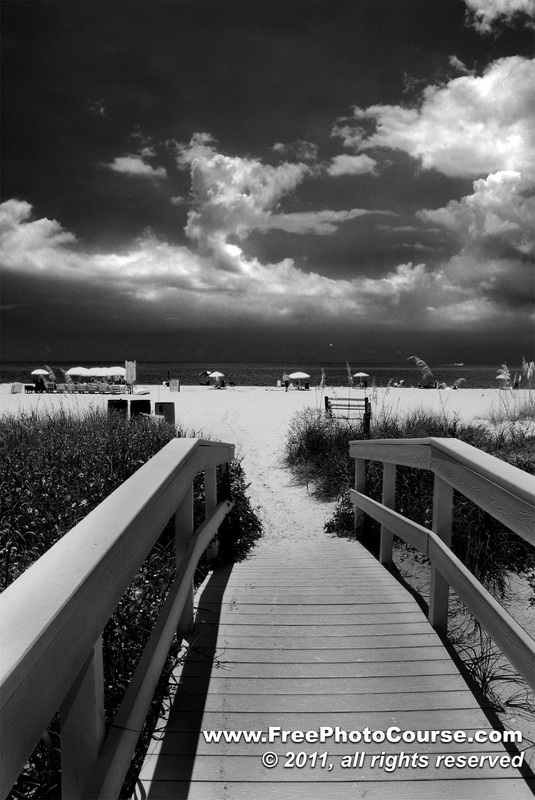
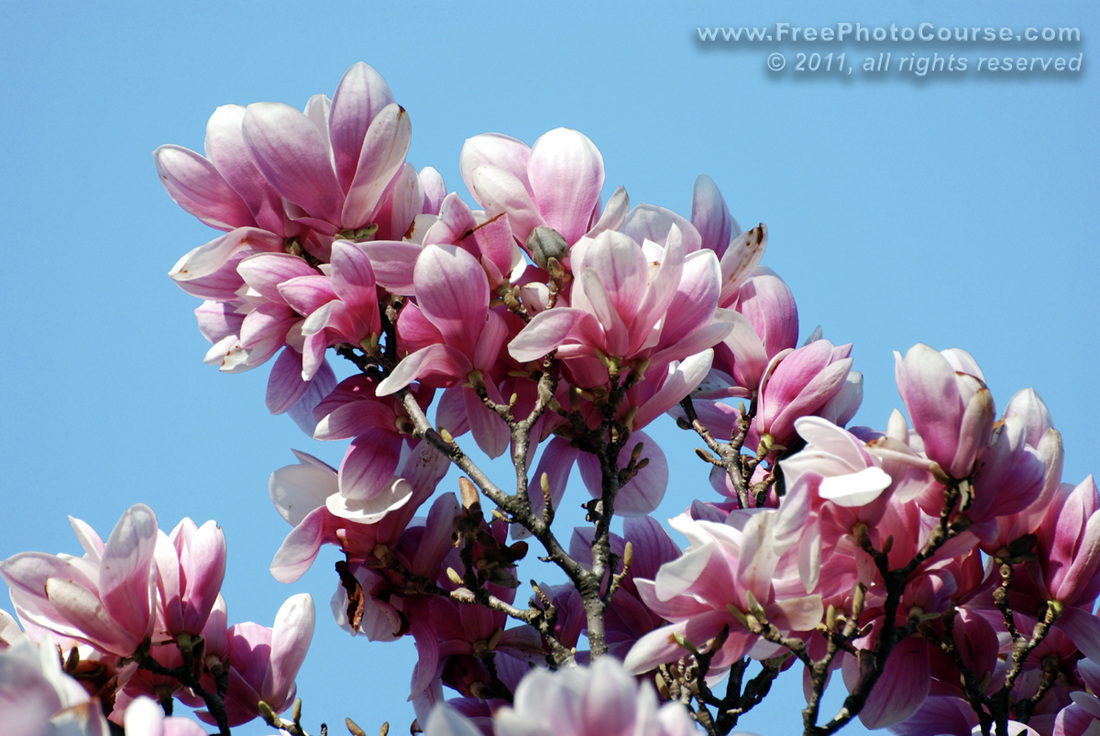
In his upcoming article, "How To Use Photoshop to Turn Pictures Black & White",
Stephen Kristof will reveal some hot Photoshop techniques that will turn a blue sky dark,
while leaving the clouds crisp and white, like the one below!
Stephen Kristof will reveal some hot Photoshop techniques that will turn a blue sky dark,
while leaving the clouds crisp and white, like the one below!
Next Interesting HOW-TO Photography Article:
Boom...Aaaaah!! How to Photograph Fireworks!
LINKS:
HOME PHOTO TIPS INDEX DIGITAL PHOTOGRAPHY COURSE "HOW TO" INDEX PHOTO FORUM
SITE SEARCH CONTRIBUTOR'S GALLERY CAMERA & GEAR STORE FREE DIGITAL IMAGES
PHOTOGRAPHER PROFILES NYC EXPOSED
© FreePhotoCourse.com. All rights reserved. Reproduction, storage, copying, publishing, manipulation, digitizing or selling of any of the text or photos on this website is strictly prohibited. Under no circumstances shall any part of the content on this website be plagiarized or referenced as the work of an author or photographer. Re-selling of any of the content on this site is strictly prohibited. The lessons on this website were provided free of charge for individual home users; if you paid for any of this you have been cheated. Please report any misuse, sale or plagiarism of this material here OR E-MAIL US AT: CONTACT@FREEPHOTOCOURSE.COM
Browse, learn, purchase and explore with confidence.
Certified virus-free, malware-free, spyware-free, scam-free and spam-free
Associate-Sponsor Disclosure Content Download & Terms of Use Privacy Policy Contact Us Contributor's Gallery Terms of Use Forum Terms of Use
Certified virus-free, malware-free, spyware-free, scam-free and spam-free
Associate-Sponsor Disclosure Content Download & Terms of Use Privacy Policy Contact Us Contributor's Gallery Terms of Use Forum Terms of Use