|
Why are so many budding photographers interested in night photography? The whole idea of creating photographs in the general absence of significant light is appealing in itself. However, adding to the appeal is the fact that the results often hold unexpected surprises and interesting effects!
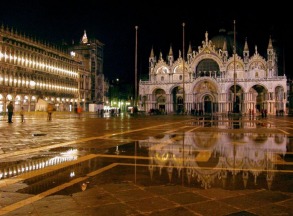
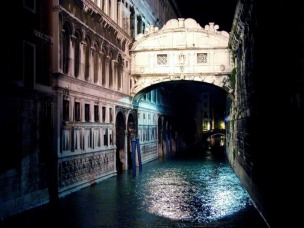
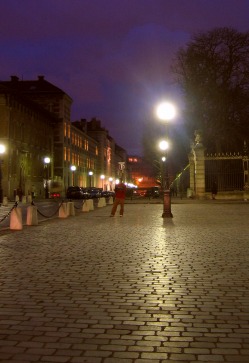
When indirect dim lighting from ambient sources or low direct light from the moon represents your primary light source(s), you begin to see the world in a completely different way. Unanticipated colours, shadows and textures begin to show, as well as oddly glowing objects, streaking or wobbling lights and a generally ethereal or sometimes surreal appearance. Necessary Equipment: ü Camera that is capable of manual long exposure times of at least 10 seconds. (The longer, the better.) Some of the inexpensive ‘user friendly’ point & shoot cameras have a ‘night’ setting, but your results will likely be inconsistent using this program feature. Better to go with long exposures of multiples of seconds for the best results. ü Sense of your surroundings; not really "equipment", but important nonetheless. Your personal safety is of primary importance! Remember that the night-time environment is different. You may not be as safe in some areas at night as you would be in the day time. If in doubt do not go there. If possible, bring a friend. (‘nuff said!) ü Tripod - If you plan on creating photos that will be crystal clear along with objects and/or lights that have fine detail and resolution, you will absolutely need a tripod in order to remove every bit of camera or photographer movement. ü Memorory Cards and Batteries - Make sure you have enough image and power capacity to take A LOT of bracketed photos. You don't want to be fiddling with editing and deleting the photos in the dark. You also don't want to run out of what makes the camera work before your session is done. Imagine waiting for an hour or so for the "real" show to begin - for instance, when the moon rises high enough in the sky beyond some low clouds to illuminate your scene...only to find out that you've run out of batteries or memory! ü Camera with Adjustable F-Stops/Aperture/ISO - is necessary in order to manipulate the exposure. In some instances, you want the lowest f-stop in order to let the maximum amount of light into your camera. However, if you want ultra-sharp images of far-away landscapes, you will want high numbered f-stops which will produce clearer images with greater depth of focus ("depth of field"); the drawback of high f-stops is that they allow far less light into the camera - meaning much longer exposures. If you can manage a very long exposure of up to 5 minutes in some cases, then you can get away with high f-stops. Long exposure times may also allow you to roll-back the ISO to a lower number. Lower ISO numbers result in higher resolution and less "noise"; all necessary for sharp, clear night-time photos! üManual focus is absolutely necessary so that you can focus on what or where YOU wish to focus and leave it focused there instead of an auto focus that will constantly drift. Choose manual focus, learn how to use it and then lock it in or order to keep things clear. üUse Long Exposure Noise Reduction if your camera is so equipped. This is a feature usually reserved for DSLR cameras, because DSLR cameras are most commonly the only ones with long exposure times in excess of 15 seconds. This technology allows the very dark or black areas of your scene to stay that way despite the fact that the CMOS or CCD is actively working on creating an image during the entire exposure time. The long exposure noise reduction feature discourages, during the exposure and/or afterward in image processing, the amplification of ambient electronic noise which can turn a jet-black sky into a jumble of random splotches. hint - before you shoot your important night time event using long exposure noise reduction, it is recommended that you experiment with the feature both engaged and disengaged well in advance. Look at your results on your computer and compare. You may find that the way your camera handles this feature may require some other adjustment that you'd like to know about in advance of the big shoot! |
Freebies UK
Regularly updated with the latest freebies and free offers from around the UK, get free holidays, enter free competitions, win free money and much more. |
|
How and What to Photograph on Your Night-Time Outing
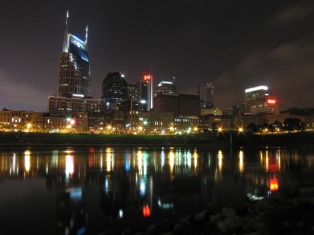
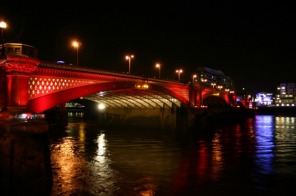
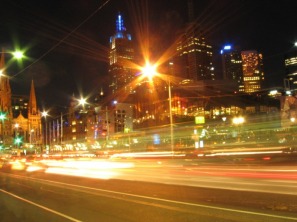
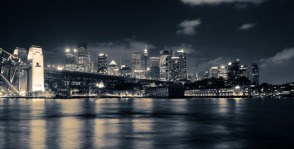
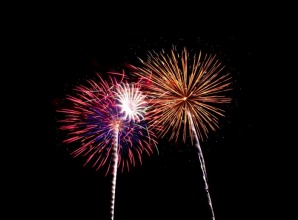
Experiment and "Bracket"! Bracketing is taking multiple shots with varying manual exposure settings. This means that while one may look good on the back of your camera, another one that is shot at a different setting and which may look worse on that tiny 2-inch screen, may look far better on your computer monitor. Whether using traditional film or digital, take MANY more night shots than required at different manual exposure and aperture settings. If using digital, review your shots at a later time on your computer before deleting. The Night Sky… on clear nights, shots of the moon or stars can look SPECTACULAR! If you are photographing a bright moon (other than rising or falling to the horizon, when it is darker and more orange than white), you will need to use a medium or small aperture of perhaps f-8 to f-16 and may use a longer lens to bring the moon closer. You are basically taking a photo of a light, so you will not need a long exposure. If taking shots of stars without the moon, you will definitely need long exposure times (6 seconds or much longer depending on your f-stop). Keep planetary rotation in mind - this means that your stars will end-up looking like streaks (or circles) if your shutter is open for too long. If you are using a standard 50mm lens, your longest exposure is 12 seconds before things begin to blur. If you are using a lens longer than 100mm, you may have less than 6 seconds! Car Lights Streaking By… Use a tripod and leave your shutter open while cars speed by. In color images, you will see separate white streaks from headlights and red streaks from taillights. Using a tripod will leave the lights from buildings and streetlights still and clear, emphasizing the streaking lights. Using a hand-held technique will reveal, perhaps, artistic squiggles. Using a Flash Along With a Long Exposure... Will allow you to selectively illuminate objects or areas , while relying on natural or ambient light for the rest of the photo that may be farther off in the distance. Using a Flashlight Along With a Long Exposure… Imagine keeping your shutter open for several seconds in a graveyard at night (scary!!!), then having a friend walk through the scene while you point a flashlight in his or her direction. The result would be a clear but eerie landscape with a surreal ghost-like being streaking by! Capture Long-Distance Landscape, City-scape, Riverfront or Skyline Photos... This one is a no-brainer. There are probably more night city-scape and landscape photos circulating than all other types of night photography combined. Use your tripod, find an interesting perspective and pay attention to what is at the bottom of the viewfinder, not just the top. We tend to leave a lot of sky room above city and landscapes, but consider what's going on in the sky above you when you create this type of photo. If it is a cloudy night or if huge puffy clouds are working their way slowly across the sky, then you'll want to consider devoting very little of this sky to the frame and much more of the foreground; this will avoid a smudge-like or dull appearance of the sky in a timed exposure. However, if the sky is clear and moon or star-lit, this should take up to 1/3 of the image from a vertical perspective, as it can look spectacular. How About a Working Chimney or Smokestack… Make sure visible smoke or steam is emitting from the top, and then take a long night time exposure. The white stream coming from the top will be ill-defined, but interesting when seen along with the entire house, building or factory. Fireworks are difficult to photograph, as even the deepest colours will bleach white if your aperture is too wide-open. Leave your shutter open for about 5-15 seconds, but try bracketing with higher f-stops. Also Think…SNOW, BALCONIES or whatever looks different at night! |
FINALLY, you are about to learn... (drum roll please!)...
HOW TO PHOTOGRAPH LIGHTNING - ELECTRICAL STORMS
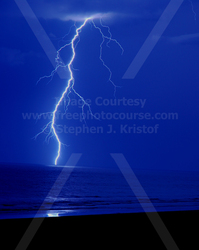
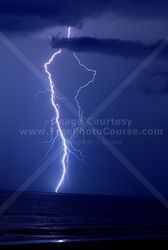
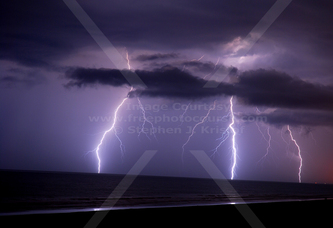
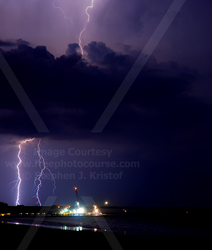
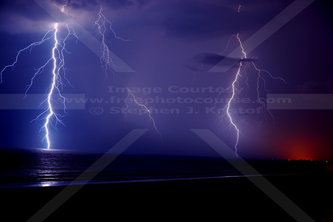
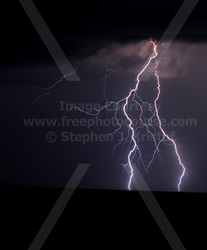
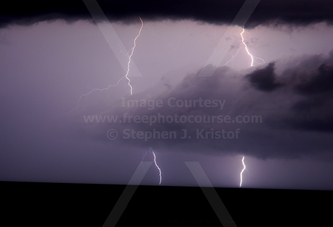
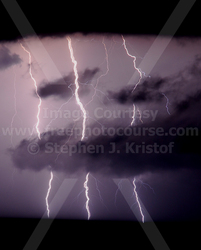
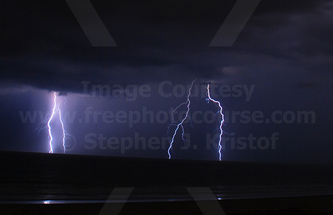
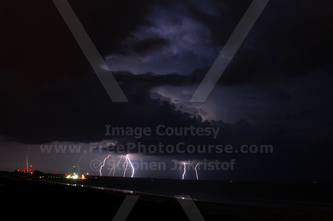
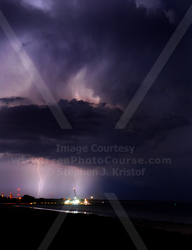
LIGHTNING Images are Crowd-Pleasers! However, trying to capture them can be a bit tricky. It's partially technique and partially luck. Follow the guidelines below the following gallery if you wish to continue.
*(note - as with all of the images appearing on our "Course/Lessons", "Quick Tips" and "How To" pages, these photographs are copyrighted and may not be legally downloaded, stored, transmitted, modified or used for any purpose. The following lightning photos are all property of FreePhotoCourse.com. All of this training is provided to you free of charge - please respect the photographers' property rights! If you are interested in downloading our FREE images for use on computer desktop displays or other non-commercial, personal use, please visit our FREE Digital Images section. Thank you!)
HOW TO SHOOT LIGHTNING BOLTS:
The #1 consideration in lightning photography is to protect yourself!!!
First of all, please do not misunderstand or misinterpret this "how-to" advice as a recommendation to conduct ANY activity - photographic or otherwise - outdoors in the midst of or near electrical storms! Let us make this perfectly clear - FreePhotoCourse.com does NOT recommend conducting outdoor day or night photography projects during electrical storms (lightning), regardless of how safe you feel you may be.
Lightning strikes are fatal, they are completely random and if you can hear the thunder and see the flash, you are fair game; they can reach dozens of miles across a sky and strike far from the rest of the storm. If you still choose to do so, you are at your own peril.
Lightning Photography Can and Should Be Done From a Safe, Sheltered, Indoor Location.
Photographing lightning from a safe indoor location:
You MUST use manual focus for this type of assignment. This ensures that you can pre-focus on an active area in the distance without the focus drifting or changing. Trying to focus in darkness using an auto-focus system is a useless pursuit; the camera will not be able to focus on anything in particular and every image will be blurry.
Manually pre-focus on an area where the lightning is likely to occur, based on what is going-on around you. Leave your f-stop at a medium or small aperture opening, as the flashes can be quite intense and can cause a "spread" of light at wide apertures. For night images, adjust your ISO to about 200 or 400, as higher settings will be far too sensitive to the bright flash. If you try to capture lightning strikes during the day as opposed to at night, you will need a neutral density filter to subdue the light to near night-time levels, a high f-stop and low ISO. This will allow you to shoot long exposures during the day time as you wait for another lightning strike.
You will then need to take exposures at 30-second intervals. Do not move the tripod at all while the shutter is open! Wait until the shutter closes and try again and again. Experience shows that the lightning will usually strike JUST AFTER your shutter closes! How frustrating! Don't worry - keep trying and you may eventually get some amazing images.
In terms of FRAMING night-time lightning strikes, it is essential to capture the entire vertical path of the strike. From the cloud to the ground (or ocean/lake/river), you must get the entire strike. Be careful with use of zoom in this instance. It is less appealing to get a really close view of the tiny "veins" or branches of the bolt and more interesting to see the bolt in its entirety. As long as one can see the main branches along the entire path, this is ample detail.
Most photographers frame lightning images horizontally, even though the strikes are mainly vertical. This is because it affords a better opportunity to get more of the sky in the frame, thus increasing the chances of capturing various strikes that may appear between your left and right boundaries of the frame. Photo pro's will then use Photoshop or other image editing software to crop the image more tightly into the bolt. If the bolt is primarily vertical, cropping will follow this orientation. If the bolt stretches across the sky (as with, for instance, spider lightning), the cropping will follow a horizontal orientation.
PATIENCE is a MUST for this type of photo work! There's one thing that's an absolute certainty; here's how it works. You see lightning occurring in one area, then proceed to shoot several successive long exposures in that direction without success. You change the camera position to a "new" area of the sky that's beginning to show some electrical activity. When you press the shutter an AMAZING strike will certainly occur.......in the original area from which you had just moved!
LAST CONSIDERATION - Film or Digital for Long Exposures?
When it comes to low-light or night photography, film cameras generally offer better photo resolution and less ‘noise’ than digital cameras. One reason is that the processors in many digital cameras don’t deal well with lack of light; they often try to automatically amplify available light, even in manual mode. What results are patches of lighter pixel clusters in areas that should otherwise be completely black. However, most Digital-SLR cameras have menu modes that will allow for "long exposure noise reduction" as mentioned in the section about the lightning slide show, which, in the more expensive models, will almost entirely eliminate the noise factor. Use it if you can.
NEXT PHOTOGRAPHY HOW-TO ARTICLE
© FreePhotoCourse.com. All rights reserved. Reproduction, storage, copying, publishing, manipulation, digitizing or selling of any of the text or photos on this website is strictly prohibited. Under no circumstances shall any part of the content on this website be plagiarized or referenced as the work of an author or photographer. Re-selling of any of the content on this site is strictly prohibited. The lessons on this website were provided free of charge for individual home users; if you paid for any of this you have been cheated. Please report any misuse, sale or plagiarism of this material here OR E-MAIL US AT: CONTACT@FREEPHOTOCOURSE.COM


