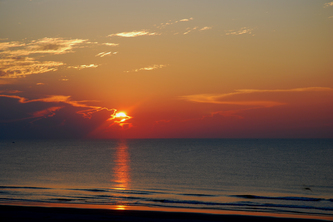
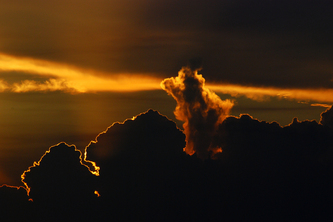
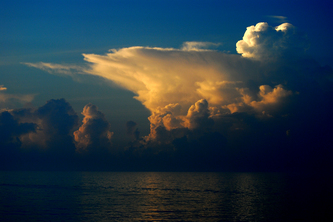
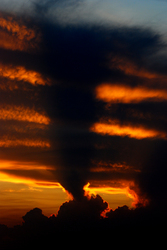
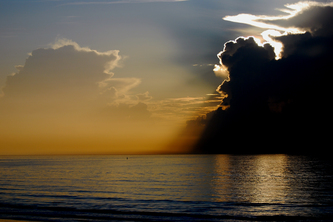
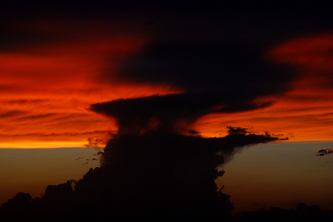
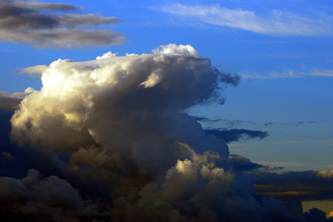
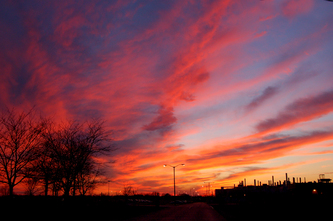
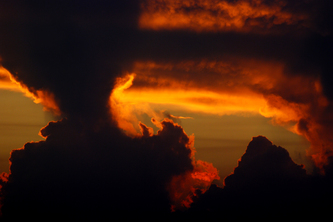
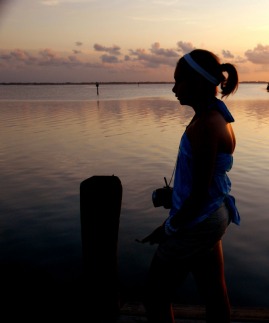
Ahhh, the captivating and enduring beauty of a sunset or sunrise photograph! There’s something elemental – maybe even primordial - about our universal response to the depth and array of warm colors radiating from a central point across a cloud-dotted, wide-open sky. When all the elements come together the right way, we are in awe and wait in surrender; even the toughest heart will melt and submit to the splendor we see.
Another common response we share is the desire to capture and preserve the magnificence of that perfect sunrise or sunset in front of us. Whether we’re looking out over water, a pasture, a mountainous scene or a forest below, if we have a camera, it’s surely pointed toward the show. If we forgot to bring a camera, we fill with regret and wish we had remembered one.
Most photography enthusiasts have at least one excellent sunrise or sunset image in their portfolio. At the same time, they may have dozens, perhaps even thousands, of other sunrise and sunset images from attempts that simply don’t reflect the depth of what the sky had originally offered.
What can you do to turn that perfect sunset or sunrise into an award-winning photograph? First of all, with the exception of #2 below, there is little difference between photographing a sunset and a sunrise. In one case you're facing east and shooting before the sun crests the horizon - and - in the other, you're facing west and shooting after the sun dips below the horizon. There’s more to it, though, in terms of what to do with your camera. So follow the suggestions below this small gallery of sunrises and sunsets, and you’re on your way to creating compelling images worthy of framing or entering into contests.
LOOKS AMAZING...
Now Here's How to Do it!
#1 – Put the Ball Below the Horizon!
If it’s a sunset you’re capturing, some of the most intense hues and patterns will appear in the sky AFTER the sun has dipped below the horizon. For sunrises, the same applies; you’ll just need to wake-up a bit earlier to see the best show before the sun rises. Consider the brightness of the sun. Even when it is just above the horizon, that big red ball is so intense that it can wash-out the colors in the sky. When the sun is below the horizon, haze, dust and particles in the atmosphere combine with the increased angle of the sun to create more saturated red, orange, gold and violet.
#2 – Sunrises Wash-Out Faster than Sunsets
One thing to watch for when photographing a sunrise as compared to a sunset is tighter timing. Although #1 above suggests that the best show occurs when the sun is below the horizon, you can still capture some exceptional images (given some camera manipulation noted below in #3), of sunsets as the sun descends toward the horizon. The show in the sky will continue, in some cases for up to 30 minutes, after the sun sets. However, the color and glory of a sunrise is far more short-lived. You need to do almost all of your work before the sun rises. You may have – literally – about 30-45 seconds once the sun emerges. After that the colors in the sky will wash out.
#3 – Under-Expose The Image
If you are shooting on a fully automatic setting, we would suggest experimenting a bit. Shoot on full manual exposure control and use your light meter, if equipped. You are trying to purposely UNDERexpose your sunrise or sunset images. This will deepen the colors you are aiming to portray. Close your aperture (or alternatively choose a faster shutter speed or lower ISO number) so that the exposure is less than what the light meter indicates is necessary for a "proper" exposure. In this case you really do not want a proper exposure. You want, instead, to pop the colors and contrast. You can also try the "sunset" program mode if your point-and-shoot camera is equipped; this may or may not provide the results you seek.
You can also use a negative exposure compensation to do the same trick.
#4 – Use a Tripod and Bracket Your Exposures
This technique is for people familiar with Photoshop or other photo editing software programs that allow multiple "layers" of images or elements within the same image file. This is a great idea if you want to illuminate elements in the foreground rather than portray them as silhouettes. Photograph your sunset or sunrise using the underexposure method as noted above in #3. Without moving your zoom or the camera itself, take several other photos during the next thirty seconds, each photo exposed with more light.
Open your first image in your software program. Then, choose only one of the successive images that best illuminates the foreground element(s). Drag or paste this second image over top of the first. Then use an airbrush eraser tool to remove the washed-out sky from the overexposed (top) image, without erasing the bottom or foreground part. Done skillfully, this technique provides the best of both worlds!
#5 - Una Corona Por Favor!
No, it’s not about beer – sorry - but this one lasts longer anyway. When photographing a sunrise or sunset with puffy clouds that have well-defined edges, you may be able to capture stunning pictures of gold radiance or a "corona" around the clouds.
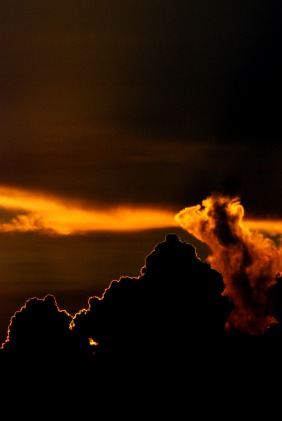
As the sun rises or sets, it may hide behind one of these types of clouds. Don’t be discouraged. They say that, "Every cloud has a silver lining," but with this one, it’s even better because this paricular lining is made of gold!
#6 – Clouds Can Be Your Friend!
The more sunsets and sunrises you work with, the more you’ll begin to understand the types of clouds that in general work to your advantage and the types that will quash your efforts. First of all, avoid overcast days; don’t waste your time because a classic sunrise or sunset will not occur. Clouds that are high and stretched-out tend to produce more color and for longer periods of time.
#7 - Where is Your Horizon?
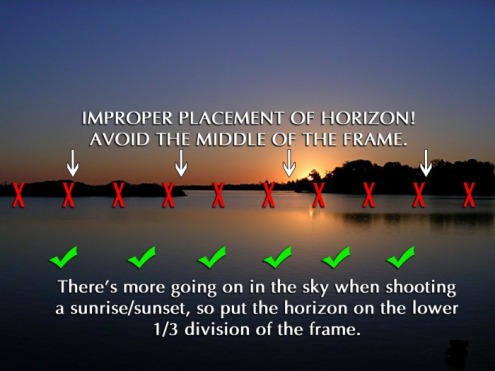
Centering a horizon is a very bad, yet very common, photographic mistake. Take heed; centering your horizon will effectively split your image in half, which makes for a static that the eye and brain finds uninteresting. Consider that a sunset is all about the sky! Give the sky center-stage and place your horizon along the lower third of the frame. Also remember to shoot horizontally, unless an interesting vertical cloud formation necessitates a vertical frame.
#8 – Look For Natural Frames and Silhouetted Foreground Elements
Sometimes a less dramatic sunset can be enhanced by changing your position so that a silhouetted object in the foreground can add an element of interest to the image as a whole. Think about palm trees, bridges, boats, piers, weeping willows, hammocks, lighthouses, old fashioned windmills, farm implements and the like. The object should "speak the language" of the location.
You may also find an object or a combination of objects that helps to frame the sunset, thus creating what is commonly referred to in photographers’ circles as a "natural frame".
#9 – How to Photograph People In Front of a Sunset
What better backdrop for a portrait than a beautiful sunset, right? But if you’ve tried this, you may well have encountered an overly dark or shadowed face that shows-off the sky but not the person. The problem is created by the dimness of light reflected off your subject relative to the brightness of the sunset. In "auto" mode, your camera usually adjusts the exposure for the sunset rather than the subject, resulting in a silhouetted portrait.
On the other hand, if your camera adjusts the exposure for your dimly-lit subject, the sunset will appear too light and washed-out. Better to illuminate your subject and keep the exposure lower to enhance the colors of the sunset.
Fortunately, as you can see above, fixes for this problem are easy. Use a forced or "fill" flash so that your camera’s flash bursts despite the fact that there is enough light in the sunset itself (which is why the camera will not flash in automatic in such a situation). The drawback of this solution is that the flash will illuminate with a more neutral or cold color tone than the rich, warm tones of the sunset. The better alternative is to use a portable reflector/illuminator. (You can purchase one below – this is an essential MUST HAVE for any serious photographer or photo enthusiast! Best yet, the price is very affordable and once you have it you’ll want to use it over and over again!) Use the gold reflector for sunsets to enhance the warm color tone.
#10 - Get a Reflector/Illuminator for your sunset portraits!
This is a MUST-HAVE for any serious photographer. Even better than using a fill flash is to use a gold metallic reflector.
Good Luck with your sunset images and consider showing off your best work in our Contributor’s Gallery. You keep the rights, but we’ll show it off to the world for you! Send your best shot to: submissions@freephotocourse.com
NEXT PHOTOGRAPHY HOW-TO ARTICLE
© FreePhotoCourse.com. All rights reserved. Reproduction, storage, copying, publishing, manipulation, digitizing or selling of any of the text or photos on this website is strictly prohibited. Under no circumstances shall any part of the content on this website be plagiarized or referenced as the work of an author or photographer. Re-selling of any of the content on this site is strictly prohibited. The lessons on this website were provided free of charge for individual home users; if you paid for any of this you have been cheated.
Please report any misuse, sale or plagiarism of this material here OR E-MAIL US AT: CONTACT@FREEPHOTOCOURSE.COM

