|
HOW TO...
Architectural & Travel Photography |
|
|
|
"How does one get stunning pictures of skyscrapers, modern architecture and historical structures?"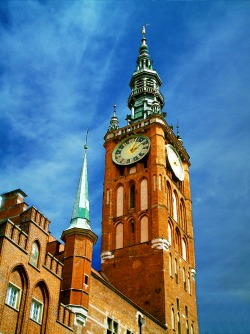
So, you're traveling to a different part of the country or, perhaps, overseas. There’s no question that your camera is one of the most important things to pack. But have you given much thought to how you will make the most out of the area’s architectural features and historical structures, photographically-speaking? Article, selected photography by Stephen J. Kristof
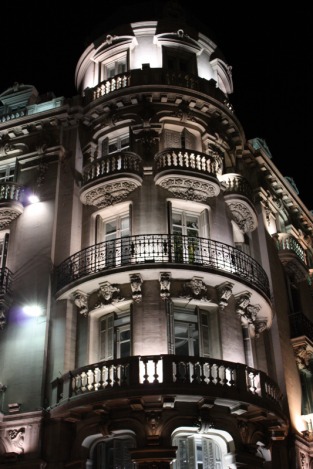
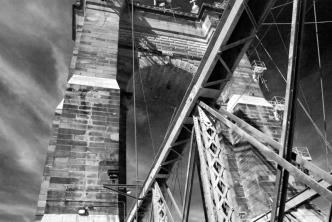
© 2010, all rights reserved As remarkable as the architecture may be, the average "picture taker" is usually ill-equipped when it comes to exploiting some of the most visually-rich opportunities that may lie in wait. Did you know that architectural photography is actually a specialized branch of the overall art; one that many professionals make their exclusive source of income? Now, while it’s true that reading an article won’t replace the years of training and experience a professional architectural photographer has received, following-through on some powerful architectural photographic technique and composition strategies can do a great deal to improve the interest level and appeal of your photos! Follow these pro secrets to make an interesting building look like the artistic creation it really is: 1. Magnificent structures and scenes do not automatically translate to magnificent photographs We can’t dwell on this enough – just because something looks breathtaking in person does not mean it will look quite so dramatic in a photo. This is because the awe one experiences when seeing an architectural structure in person is partially due to the stimulation of all of one’s senses. The sheer height or scale of a building can, in itself, overwhelm. The intensity and warmth of the sun’s rays not only feels wonderful on our skin but can also impart a brilliance that can never be replicated in a photograph. Seeing a famous structure for the first time can make the scene appear more intense. The sounds and smells around us – all of these things - are part of the experience but not of the photograph. What’s the solution? If the scene is jumping-out at you emotionally, don't photograph it as casually as you are looking at it! Look for ways to make the photographic representation appear as impressive as it "feels" in real life. Get lower and look up. Turn the camera 90 degrees and try a vertical perspective. If a particular part of the structure is extremely special, zoom-in to that part. Ask yourself as you look through the viewfinder, "Is this a really stunning photo of a really interesting building or is it just an everyday picture of a really interesting building?" 2. Try photographing at different times of the day and night This pro secret is so very important because the direction, intensity and color of light changes as the day moves on and the impact of this can, in-turn, alter the appearance of the structure dramatically. Ideally, you want to shoot the building or structure when the light is somewhat behind your shooting position. The goal here is to have the building lit in such as way as to reveal and enhance its contrast against the sky and surrounding area. If the sun is not directly behind you, but just slightly off to the left of right, it may help to produce subtle shadows that help to reveal texture and form. Try to avoid back-lighting or "high-noon" overhead lighting, as the result may be an overly shadowed and dingy looking structureagainst a lifeless and rather bleached-out sky. 3. Use a wide-angle lens Unless you need to get a tight shot of a particular feature on the building or structure, most architectural photo pros shoot with very wide angle lenses. If using a DSLR, you want to use either a 10-20mm or 18-28mm lens. These lenses provide the flexibility to show vast portions of a large building, even when it’s physically impossible to get far enough from the structure to capture it with a standard lens. These ultra-wide lenses (available here) also provide a measure of edge distortion and image skewing which can make for a very interesting architectural photograph. For example, when shooting a tall building from ground level, a lens like this will result in a striking – even imposing – appearance, possibly matching the experience of being there in person! Such lenses are also wonderful when it comes to shooting expansive landscape photographs. (article continued below) |
|
|
|
4. Wait for Mr. Blue Sky
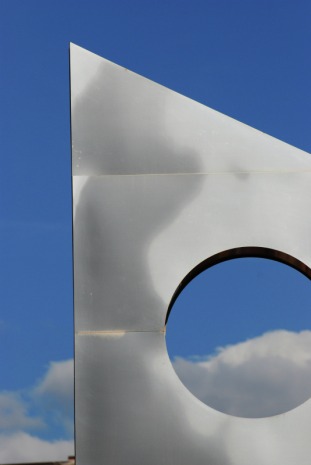
If you are shooting in color, blue skies and clear days will do the most to show-off large structures most favorably. When traveling, you can’t always go back for another shot – particularly if your vacation is short-lived the weather has not cooperated. However, if you are staying over for awhile, then you might as well take advantage of a blue sky when it eventually shows-up.
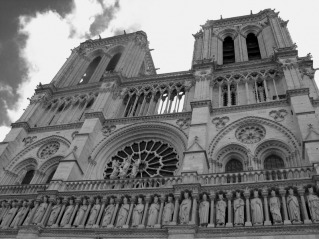
If you intend to produce a monochrome (black and white) photo (remember that older structures with more formal lines and detail tend to work best in monochrome), a deep blue sky with a few puffy white clouds scattered about may work best. Shoot with a red filter or use the red channel in Photoshop to turn your blue sky dark, leaving the clouds brilliantly white, which creates a striking backdrop for your monochrome architectural photograph!
The rule about a blue sky is different if you’re photographing a neglected old building that’s in a state of disrepair. Such buildings can be very interesting because of the dilapidation. When that’s the case, a grey overcast sky may actually work better than the clear, blue sky.
5. Shoot at night
As much as the different quality of light at different times of the day can dramatically alter the appearance of a structure, night-time long exposure images offer yet another way to transform your subject into something that’s perhaps quite magical! Use your tripod and experiment with very long exposures, low ISO settings (to reduce noise/grain) and high f-stops (to increase depth of field and to allow for the long exposure). Bracket these manual exposure variables many times to get different versions.
The ambient light from the moon and street lighting will fall upon your structure in ways not seen during the day. Lights on and purposely illuminating your building will also create something quite special!
6. Vertical vs. horizontal orientation
If the building is wider than it is tall, shoot horizontally. If it is taller than it is wide…you get the picture!
7. Use Photoshop to remove unappealing or distracting elements
Utility poles, fire hydrants, cars, wires, window reflections – these are all things that may interfere with your image and become distracting elements. Change your position if you can. If you cannot, you may need to use Photoshop or other photo editing software to wipe them from existence.
8. Formal, traditional architecture and the symmetrical challenge
You’ll notice that many of the world’s architectural creations that have historical significance also have a great deal of symmetry in their designs. While symmetry is commonly something that do (and should) avoid in their compositions, traditional architecture almost cries out to be framed in such a way. We would suggest that you try both the centered as well as some more creative approaches to such structures. When you get back to your monitor, see which ones work best. You never know – you may end-up with some distinct, yet, equally compelling perspectives of the same structure!
Good Luck with your sunset images and consider showing off your best work in our Contributor’s Gallery. You keep the rights, but we’ll show it off to the world for you! Send your best shot to: submissions@freephotocourse.com
Next interesting Photography HOW-TO Article:
How to Use Raindrops and Reflections for STUNNING Pictures!
MORE PHOTOGRAPHY LINKS:
HOME PHOTO TIPS INDEX FULL COURSE INDEX "HOW TO" INDEX PHOTO FORUM
SITE SEARCH CONTRIBUTOR'S GALLERY CAMERA & GEAR STORE FREE DIGITAL IMAGES
© FreePhotoCourse.com. All rights reserved. Reproduction, storage, copying, publishing, manipulation, digitizing or selling of any of the text or photos on this website is strictly prohibited. Under no circumstances shall any part of the content on this website be plagiarized or referenced as the work of an author or photographer. Re-selling of any of the content on this site is strictly prohibited. The lessons on this website were provided free of charge for individual home users; if you paid for any of this you have been cheated. Please report any misuse, sale or plagiarism of this material here OR E-MAIL US AT: CONTACT@FREEPHOTOCOURSE.COM
Browse, learn, purchase and explore with confidence.
Certified virus-free, malware-free, spyware-free, scam-free and spam-free.
Associate-Sponsor Disclosure Content Download & Terms of Use Privacy Policy Contact Us Contributor's Gallery Terms of Use Forum Terms of Use
Certified virus-free, malware-free, spyware-free, scam-free and spam-free.
Associate-Sponsor Disclosure Content Download & Terms of Use Privacy Policy Contact Us Contributor's Gallery Terms of Use Forum Terms of Use
